The Ultimate Foodie Guide
Recipes. ★ How Tos. ★ What to Know.
Food has a way of bringing people together and we thought what better way to connect with our readers than by putting together our first-ever food lover’s guide. We’ll tell you how to properly make homemade pasta, what you need to know about purchasing fresh seafood and why befriending your local butcher may be in your best interest. We also tapped a few of the area’s finest restaurants to provide us with a recipe for a standout dish pulled right from their menus so you can try to recreate the magic in your very own kitchen. We hope you brought an appetite.
310 Restaurant’s Jerk Mahi Mahi With Fennel Slaw And Mango Sauce
 Jerk Seasoning:
1 tsp. onion powder
1 tsp. dried thyme
1 tsp. ground allspice
1 tsp. ground black pepper
1/4 tsp. ground cinnamon
1/4 tsp. cayenne pepper
1/2 tsp. salt
1/2 tsp. garlic powder
1. Combine all ingredients in blender or coffee grinder.
2. Blend until finely ground.
Mango Yogurt:
1 large fresh mango
1 1/2 tbsp. sugar
1 tsp. fresh lemon juice
1/4 cup plain Greek yogurt
1. Peel and pit mango and cut into pieces.
2. In a food processor, purée mango with sugar and lemon juice until smooth.
3. Add Greek yogurt to the puree and continue to mix until well blended.
Fennel Slaw:
3 oz. julienned fennel
1 oz. julienned celery
1 oz. julienned Granny Smith apple
1/2 oz. honey
1/2 tsp. salt
1/4 tsp. black pepper
1 oz. apple cider vinegar pinch celery leaves
pinch fennel fronds
1. Combine all ingredients in a bowl and mix gently.
Mahi Mahi:
8 oz. fresh Atlantic Mahi Mahi
2 oz. olive oil
1. Heat oven to 375 degrees Fahrenheit.
2. Rub Mahi with jerk seasoning.
3. Heat oven-safe skillet on medium-high heat.
4. Add 2 oz. of oil to skillet and sear the Mahi Mahi on each side for 3 minutes until crisp around the edges.
5. Put the skillet in the oven for roughly
8 minutes until Mahi Mahi is firm to the touch.
Chroma Modern Bar + Kitchen’s Korean Barbecue Glazed Lamb Ribs with Daikon Salad
 Korean Barbecue Glaze:
2 cups soy sauce
1 1/2 cups brown sugar
4 tbsp. minced garlic
2 tbsp. rice wine vinegar
2 tbsp. Sriracha
2 tbsp. minced ginger
2 tbsp. sesame oil
4 tsp. black pepper
2 tbsp. corn starch
2 tbsp. water
1. Mix soy sauce, brown sugar, garlic, rice wine vinegar, Sriracha, ginger, sesame oil and black pepper in a sauce pan and bring to a simmer. Simmer for 15 minutes.
2. Place corn starch in a small bowl and mix in water to make a slurry.
3. Whisk corn starch slurry into sauce pan mixture.
4. Allow glaze to cool.
Lamb Ribs:
1 rack of lamb ribs
1 oz. of dry rub of choice
Korean barbecue glaze
1/2 oz. shredded daikon
1/2 oz. shredded carrot
1 pinch daikon sprouts
1. Coat lamb ribs in dry rub of your choice about 2 to 3 hours before cooking or earlier.
2. If smoking is your preferred method of cooking,
prepare your smoker for indirect cooking, bringing temperature to about 222 degrees Fahrenheit. Smoke until the meat is tender, about two to three hours. After smoking, let ribs rest. Cut ribs into individual pieces. Coat them in barbecue glaze and finish them on the grill or in the oven. Cook over high heat until glaze is caramelized, about 2 to 3 minutes.
3. If grilling is your preferred method of cooking, prepare gas or coal grill for two-zone cooking. Brush ribs with barbecue glaze. When grill is sufficiently heated, place rib rack on the indirect heat zone and grill for 20 minutes with the lid closed. Then flip, brush ribs with more barbecue glaze and grill for 20 more minutes with the lid closed. Allow ribs to rest. Cut into individual pieces and then coat ribs with barbecue glaze again. Cook ribs over high heat until glaze is caramelized, about 2 to 3 minutes.
4. Toss daikon and carrot with small amount of barbecue glaze.
5. Place daikon salad on plate and top with ribs and then daikon sprouts.
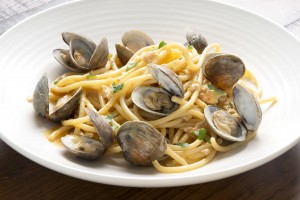
Terralina Crafted Italian’s Bucatini and Clams with Nduja Sausage
 Ingredients:
48 littleneck clams
8 oz. nduja sausage
2 pounds bucatini pasta
12 oz. dry white wine
24 oz. chicken stock
8 oz. butter
Juice of 2 lemons
Salt and pepper to taste
1/2 bunch chopped Italian parsley
1/4 cup good olive oil
1/4 cup shaved garlic
1. In a large pot, bring salted water to a rolling boil. Add pasta to water and cook until al dente.
2. In a large hot sauté pan, start the clams dry for 1 minute. Then add olive oil and garlic until the garlic is golden brown.
3. Deglaze sauté pan with white wine and reduce by half.
4. Add chicken stock, nduja sausage and butter to pan and continue to cook for 1 to 2 minutes.
5. Add parsley and strained al dente pasta to sauce and mix well.
6. Season with salt and pepper to taste and serve.
❖ Why You Should Get to Know the Butcher ❖
A trip to the butcher shop can be intimidating. With so many different cuts of pork, beef, lamb and more to choose from, it can be overwhelming to even the most adept home cook. Thankfully, you don’t have to go it alone, because you see that guy behind the counter wearing the apron? He has a wealth of knowledge to share with you.
 Different Cuts
There are some cuts every meat eater has heard of: chuck roast, ribeye, flank steak. But if you stick to only what you know, you may be missing out on quality cuts of meat that are just not as well-known as others.
“Denver is a really amazing cut of beef and it’s much cheaper than like comparable quality, which would be like ribeye or filet,” says Elliot Hillis, co-owner of Orlando Meats. “But nobody knows about it and now it’s just starting to catch on.”
Next time you’re looking for a specific cut, be sure to ask your butcher what is something similar he or she would recommend.
Chew the Fat
As buzzwords like “wellness” and “clean eating” come to dominate all discussions around food, more and more people are asking their butchers to cut the fat off their meat. But not so fast! Because, according to Brian Pecka, general manager of The Local Butcher & Market’s Winter Garden location, you’re missing out on a huge flavor boost.
For maximum tenderness and tastiness, he suggests people cook the meat and then slice off the subcutaneous fat. That way you’ll benefit from the flavor and the insulation the fat provides during cooking.
At Orlando Meats, Hillis says he tries to cut in a way that is minimally obstructive to keep each piece of meat fresher for longer.
“For example, for the tenderloins the fascia is still attached to it so that when you go to cook it, you can pull it off right there,” he says. “It’s easy and you’re getting the freshest, most unadulterated cut available.”
Prime vs. Choice
The most common question Pecka gets from customers is about the difference between prime and choice.
The U.S. Department of Agriculture (USDA) is the government entity responsible for doling out these ratings and they are meant to help consumers and businesses. The top rating for beef is prime. The second-highest is choice and select is the bottom rung.
“Prime is going to be a little bit more marbled,” Pecka says. “That’s where the flavor comes from. And it’s going to be a little bit more tender because it tends to be younger cattle when it was processed.”
Choice beef is also high-quality but has less marbling than prime. Select is still somewhat tender but doesn’t have the marbling of choice or prime.
Grass-Fed or Grain-Fed Beef
Most cattle in America are fed grain-heavy diets to fatten them up quickly and cheaply. But grain is not necessarily “good” for these animals when it comes to their health—and our health as well.
Jan L. Costa, director of Florida Fresh Meat Company, says this is because cattle in their natural state are grass eaters; they were never meant to eat grain.
“Cattle cannot digest grain,” he says. “And when they are eating grain, it literally messes up their digestive system and ruins the actual nutritional benefit of the meat.”
But not all grass-fed beef is created equal. “The better your grass, the better your meat,” Costa says.
So, if you were previously turned off by the gamey, sometimes metallic flavor of grass-fed beef after trying a run-of-the-mill brand from the local supermarket, it may be worth asking your butcher about options from livestock that are fed a high-quality grass diet.
“There’s an art to making the beef,” Costa says.
❖ How to Choose the Right Seafood ❖
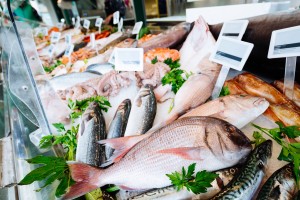
There are plenty of fish in the sea and maybe that’s why it’s so difficult to choose the right ones for dinner. A visit to your local fishmonger offers plenty of options but how do you know if that fish is fresh? What should you look for in a good scallop? What’s better: farm-raised or wild-caught?
To find out we spoke with owner of Lighthouse Seafood Tim O’Leary and Fred Thimm, owner of Reel Coastal Kitchen + Bar.
 Smells Fishy
The first rule of fresh fish is that it shouldn’t smell fishy.
“If your fish is fresh it doesn’t smell and it’s got a nice sheen to it and color,” Thimm says.
O’Leary agrees. “One of the main things when you walk into a fish store, you want to smell fish but you don’t want to smell ammonia or like rotten fish,” he says.
Other indicators that a fish is fresh: clear eyes, scales intact and a flesh that bounces back after you touch it. For fish that is already cut into fillets, you want to look for a bright bloodline and a nice shine.
But if all else fails, your nose is the ultimate tool. “Don’t hesitate to ask, ‘Hey can I smell this?’”
O’Leary says. “Anybody who’s in the fish business will be more than happy to let you smell the fish if they’re confident enough that the fish is that fresh.”
Scallops, Shrimp and Oysters
Dry is the keyword for picking out the best scallops.
“When you see the scallops and they’ve got a lot of milk—[it] looks like they’re lying in milky water, those scallops have been processed,” O’Leary says. “And what they do is they’ll leave a lot of water in your pan and they’ll shrivel up. Whereas a nice dry sea scallop [will not].”
Due to market conditions, finding fresh, never frozen, shrimp in the United States is incredibly rare. But shrimp freeze well, Thimm says, so the taste difference is negligible.
O’Leary says unfrozen shrimp should have shells that are on tight and intact. And they shouldn’t have a whole bunch of black legs or black tails.
Some seafood can be kept alive after it has been fished.
“If fresh oysters are handled properly, and it may take them six or seven days to get to you, they’re still alive,” Thimm says. “And that’s why they’re so fresh and that’s why they taste so amazing.”
Fresh mussels and clams are often sold alive as well.
Farm Raised or Wild Caught
“Wild caught is always going to be the best,” Thimm says. “There’s no doubt.”
But that doesn’t mean all farm-raised seafood is undesirable. The problem is it’s difficult to know as the consumer if the farm that raised the fish is implementing best practices such as providing the best nutrients to the animals and using sustainable methods.
Thimm says he uses the Monterey Bay Aquarium to make sure the farmed seafood he buys is the best possible. The aquarium’s Seafood Watch program offers consumers recommendations for buying seafood that is farmed or caught in the wild, including noting the sustainability and quality of the seafood in question.
Thimm also suggests that people try to buy local and, maybe, branch out of just eating the same fishes over and over.
“Get outside your comfort zone,” he says. “[It] doesn’t always have to be sea bass. That’s why we have overfishing of certain species because people get fixated.”
Safe Storage
The way fish are set in a seafood display case says a lot about a fishmonger, O’Leary says.
“If you see a lot of fish piled on top of one another, the bottom fillets are nice and cold [and] the top fillet is nice and cold,” he says. “The filets in between? They’re proteins so they’re starting to degrade against themselves.”
While proper storage of seafood begins at the market, it doesn’t end there. At home, you’ll need to put your own safe storage methods in place.
“If you’re not going to eat that fish today and keep it for a day or two, the best thing is to always rinse your fish off and dry it with a paper towel,” O’Leary says. “You can put it in a ziplock bag and keep it in the coldest spot of your refrigerator, which is generally your meat locker.”
If you do not eat the fish after two days, you should vacuum seal it or wrap it in cellophane, put it in
a zip lock bag and then into your freezer.
❖ What to Know About Making Fresh Pasta ❖
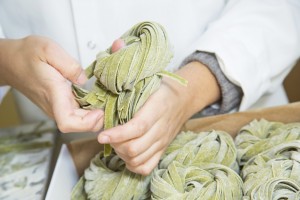
The ingredients list for pasta is short and simple: flour, salt, water, egg. But turning those ingredients into a viable dough for pappardelle or fettucine is another matter. So, we asked Marci Arthur, CEO of Cooking School Truffles and Trifles and Angelo Falcone, owner of Trevi Pasta Factory to guide us through the process and they gave us a master class in making this centuries-old staple.
 Mixing it Up
For all his years of pasta making, the best tip Falcone says he can give to those new to the craft is to be mindful of how much water they are adding to the dough.
“When you add a little bit more water than normal, you can fix it with flour,” he says. “But too much—you start adding more flour and then you realize you need more egg and then you need more salt. It’s a chain reaction.”
If you do accidentally end up with watery mush, the best thing to do is trash it and start a new batch.
“The one you try to fix, you’re never going to do it,” Falcone says.
The biggest mistake newly minted pasta makers commit is cooking their noodles too long, Arthur says.
“It takes so little time to cook it; people can’t get over it,” she says. “So they underestimate or overestimate how long it takes.”
She says for simple pastas like spaghetti or fettuccine, it should take 30 seconds to a minute for the fresh pasta to cook in boiling water. The boiling water should be salted liberally as well to expand the taste of the pasta.
Keep it Simple
Arthur is all about simplicity when it comes to showing her students how to create pasta.
“I find that the more difficult you make things, the more unlikely they are to ever do it again,” she says.
To make things uncomplicated, she has students use food processors to mix up the ingredients and pasta machines to roll out and cut the dough. She does not recommend people waste money on a fancy pasta extruder.
No food processor on hand? That’s ok. A standing mixer with a pasta hook can also be used for mixing up the ingredients.
Flour Power
Falcone uses semolina flour to make much of the noodles at his shop. Semolina is a flour with a yellow hue and a courser texture than all-purpose flour.
But Falcone doesn’t recommend beginners use semolina for at-home pasta making.
“It’s less work with the all-purpose flour,” he says. “The semolina is not harder; it just takes more time.”
Arthur says it depends on the pasta she’s making but she’ll use semolina or all-purpose.
“I do sometimes do a mixture of whole wheat and all-purpose flour together to make a pasta,” she says.
When making pasta dough, Shana Tennille, a culinary consultant for Trevi Pasta, encourages people to keep a bag of flour on hand so you can always add more when your dough is just a little too wet.
“Flour is your best friend,” she says.
This article originally appeared in Orlando Family Magazine’s May 2019 issue.


